Optical System Model Creation
Once your optical 3D system is installed, preparing the system and your golfer to collect data is a relatively simple process consisting of the following steps:
- Room Calibration
- Golfer warm-up and initial visual assessment
- Marker Placement
- Static Collection
- Data Collection
Room Calibration
Room calibration is done to create a 3D map of the room. Once that map is created, the system can take the location of a marker in view of any two cameras and tell us where in the room that marker is. Here is how we create that 3D map of the room:
 Fixed Frame:
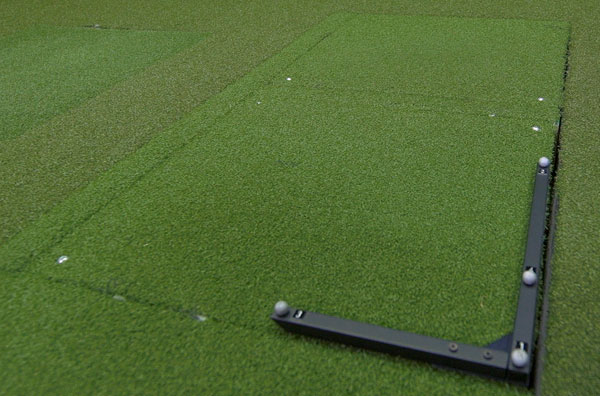
First, a fixed frame is placed in the room. This frame might be in the shape of an "L" or a cube. Our system uses an L-frame. This frame establishes the orientation of the room. It is placed on a flat portion of the floor and tells us the target line. It also provides a reference for what is up and down and forward and backward relative to the golfer.
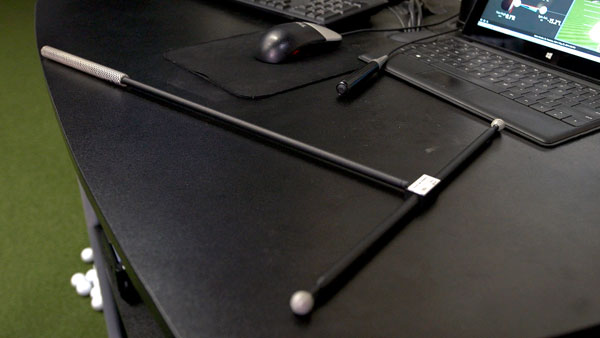
Wand Calibration:
Second, calibration includes a process that establishes where all of the cameras are, and how the images from each camera can be used together to create a 3D space. This process is called Non-Linear Transformation (NLT), but is typically called a “wand calibration” because the markers used for this process are placed on a T-shaped wand.
 During this process, we record the location of both markers in every frame. With each camera taking 2-3,000 pictures during the wand calibration, we end up with 100,000 or more pictures of the markers on the wand from all different views. The system then combines the images taken by the cameras to determine where the two markers were when every picture was taken. With this done, the system creates the 3-dimensional “map” of the room.
Ball Flight Monitor Alignment:
We calibrate our ball flight monitor to have a target line that matches the 3D system. We also project a downrange image with a calibrated target line onto the screen in front of the player in an effort to simulate a realistic golf environment.
Putting it all together:
When it's all written out, it seems like a long process, but it really only takes a few minutes. Watch the video below for a visual demonstration of the complete room calibration process.
As you have learned, every 3D system needs a couple pieces of information to operate well. It will need to know where the floor is and what the target line will be.
To establish these, we use what is called an L-frame. In our lab, we also have force plates in the floor. We place the L-frame directly over the same corner of one of our plates and now program the system to know where both plates are relative to that spot.
The next stop is wand calibration. The distance between the two markers on the wand has been very carefully measured and entered into the 3D system. We move the wand through the part of the room where the golfer and the club will be during the swing. As the wand is moving, each of the cameras is recording images of the markers. Throughout the entire calibration process, the cameras will take 100,000 or more pictures of the markers. All of this information is then combined by the 3D system to create a highly accurate three-dimensional map of the room. Once done, we will go back and check the results of the calibration.
We can turn on the calibration box that you see here. Any marker that moves within this space will be recorded with an accuracy better than one millimeter. Our golf light monitor is then calibrated and set to have a target line that matches the 3D system.
Finally, we adjust the projected image to give the golfer the correct down range target and our room set up is complete.
Golfer warm-up

We're now ready to meet our golfer, Matt. As a graduate of the Penn State PGA Golf Management program, Matt is a solid player. He has worked with Eric Handley on numerous occasions over the last several years. A typical shot shape for Matt, with both irons and woods, is to play a bit of a pull cut. His standard 7 iron carry distance is 145 yards and his typical driver total distance is 250 to 260 yards. His short game is the strongest part of his game, and he has the most room for improvement in his full swing.
Performing the room calibration and aligning the ball flight monitor have been taken care of, so we are ready for the golfer to arrive. We typically begin with a brief description of the plan for the day and the equipment that we'll be using. We'll then ask the golfer to do his typical pre-round warmup. When the golfer begins hitting, we will do a visual assessment of the swing and we'll also get some information about the golfer's playing style including strengths and weaknesses in his game as well as a typical ball flight with various clubs. Once a golfer is fully warmed up, we'll have him change into our motion capture suit.
Marker Placement
After the golfer has changed into the motion capture suit, reflective markers are placed on the body of the golfer. To perform a full analysis on the entire body, three or more markers will be placed on every body segment and the club. Some of the markers are placed in very specific, anatomical locations, and tell us where a certain part of the body is. For example, in our marker set, we place a marker on either side of the knee joint. This tells our system that the knee joint center is halfway between those two markers. Other examples of anatomically-specific markers are the two on either side of the ankle which help us find the ankle joint center, the ones on the tops of the shoulders that tells us where the shoulder joint is, and the two on the sides of the wrist. Once the anatomically specific markers are placed, we add additional markers to make sure we have at least three markers per segment.
Static Collection
The software in the system is set to know where the anatomical landmarks are in relation to the reflective markers. Prior to taking a full swing, a static (standing still) image it taken. This file is used to create the skeleton.
Now our golfer has changed into the motion capture suit.
I want to show you our markers. These are a special kind of marker, they're retro-reflective and they work with the infrared light that comes from the cameras. So actually what our cameras see are these markers, and we won't see any of you. So if you look over on our screen, you can see it's tracking our marker through space, but it doesn't actually show your body anywhere.
The marker set has clear instructions for where each market gets placed on the golfer, so putting the markers on only takes a couple of minutes. Markers typically go on easy to find locations, like the tops of the shoulders, or on the bones on either side of the wrist.
When doing the first assessment of the golfer, we typically do a full body capture, so we put markers on every segment head to toe. Once the markers are on, it's time to collect some information about the golfer, as well as the club and the ball. With the golfer holding a static position, we do a short capture. We make sure that all the markers are being captured, and then identify the markers in the software. The lines connecting the markers in this part of the 3D system are only there to help us make sure that each marker is being captured. The 3D system has been programmed to know where each marker should be on the body, so as those markers are identified, it automatically builds a skeleton which is scaled to match the size and shape of each golfer.
We also do a separate capture for each club that will be used. At this point we have markers on the face of the club that tell the 3D system where the head and face are. We also have reflective golf ball that is placed either on the floor or on a tee depending on which club will be used.
When the player is hitting the golf ball will be placed in the same location every time so the system will know where the ball is, and when impact occurs.
Now we take the markers off the face of the club and are ready to have the player start hitting while we collect 3D data.
Data Collection
The golfer can then take a few more warm up swings to get used to the 3D suit. Once done, the golfer is ready to hit some golf balls and start learning about his or her swing.
Eric: All right, Matt, I think we're ready to start doing some captures. So I want you to do like you would out on a golf course, normal shot routine, and keep in mind that we're going to try to have the ball land as close as you can to the white line.
Matt: Okay.